Transform your garden into a beautiful, low-maintenance space with our easy-to-follow guide. With a few basic tools and some helping hands, you can complete your artificial grass installation in just a weekend.
Below, you’ll find a simple breakdown of how to install artificial grass, along with essential tips to achieve professional results.
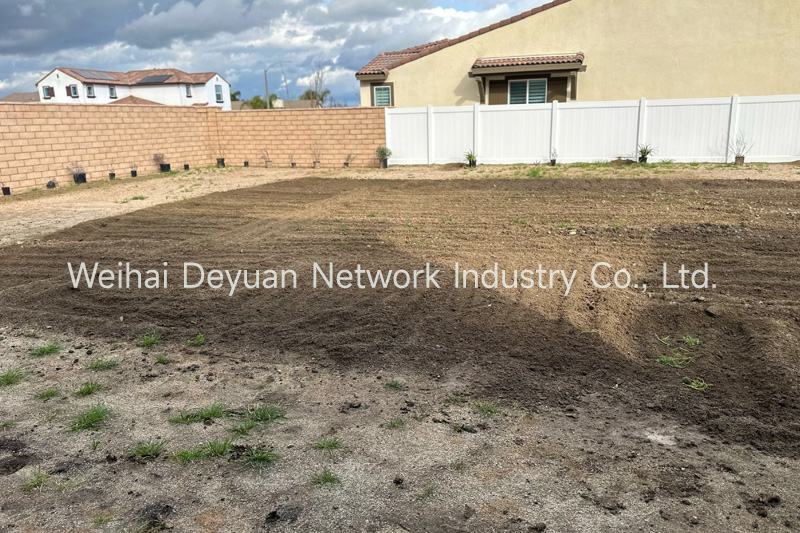
Step 1: Excavate Existing Lawn
Start by removing your current grass and excavating to a depth of around 75mm (about 3 inches) below your desired finished lawn height.
In some gardens, depending on existing levels, you can just remove the existing grass, which would remove around 30–40mm, and build up 75mm from there.
A turf cutter, which can be hired from your local tool hire shop, will make this step much easier.
Step 2: Install Edging
If there’s not an existing hard edge or wall around the perimeter of your lawn, you’ll need to install some form of retaining edge.
Treated timber (recommended)
Steel edging
Plastic lumber
Timber sleepers
Brick or block paving
We recommend using treated timber edging because it’s easy to fix the grass to (using galvanized nails) and provides a neat finish.
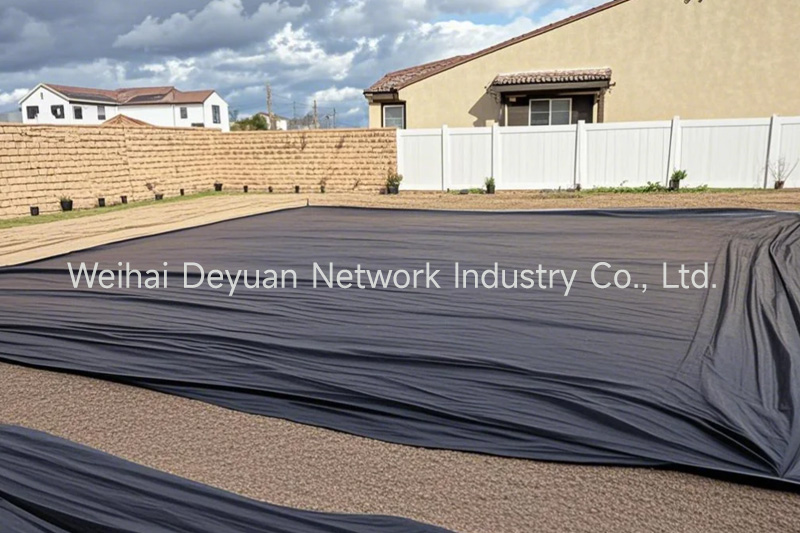
Step 3: Lay Weed-Proof Membrane
To prevent weeds from growing through your lawn, lay weed membrane to the entire lawn area, overlapping the edges to ensure weeds cannot penetrate between two pieces.
You can use galvanised U-pins to hold the membrane in place.
Tip: If weeds have been a significant issue, treat the area with weedkiller before laying the membrane.
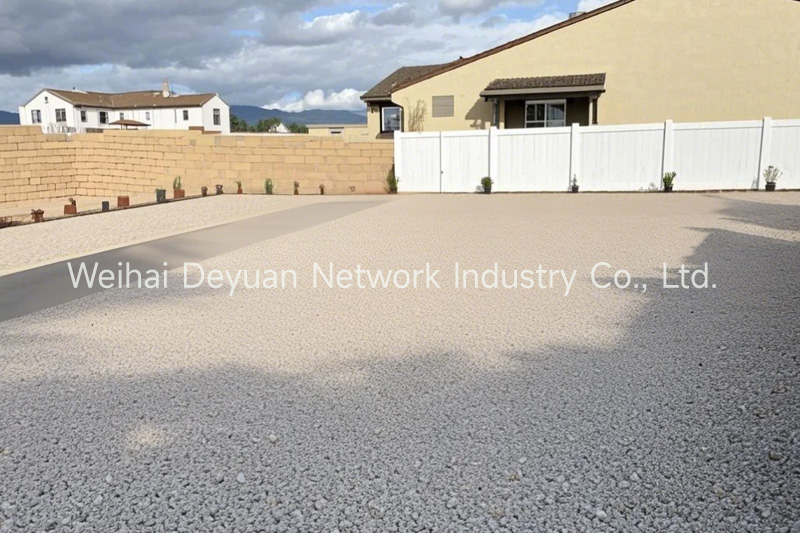
Step 4: Install A 50mm Sub-Base
For the sub-base, we recommend using 10-12mm granite chippings.
Rake and level the aggregate to a depth of approximately 50mm.
It’s very important to ensure the sub-base is thoroughly compacted using a vibrating plate compactor which can also be hired from your local tool hire shop.
Step 5: Install A 25mm Laying Course
For the laying course, rake and level approximately 25mm of granite dust (grano) directly on top of the sub-base.
If using timber edging, the laying course should be levelled to the top of the timber.
Again, ensure this is thoroughly compacted with a vibrating plate compactor.
Tip: Spraying the granite dust lightly with water will help it bind and reduce dust.
Step 6: Install An Optional Second Weed-Membrane
For additional protection, lay a second weed-proof membrane layer on top of the granite dust.
Not only as extra protection against weeds but also as it helps to protect the underside of your DYG Grass.
As with the first layer of weed membrane, overlap the edges to ensure weeds cannot penetrate between two pieces. Pin the membrane either to the edging or as close to it as possible and trim any excess.
It’s very important to ensure the membrane is laid flat as any ripples may be visible through your artificial grass.
NOTE: If you have a dog or pet that will be using your artificial lawn, we recommend that you DO NOT install this additional layer of membrane as it can potentially trap nasty odours from urine.
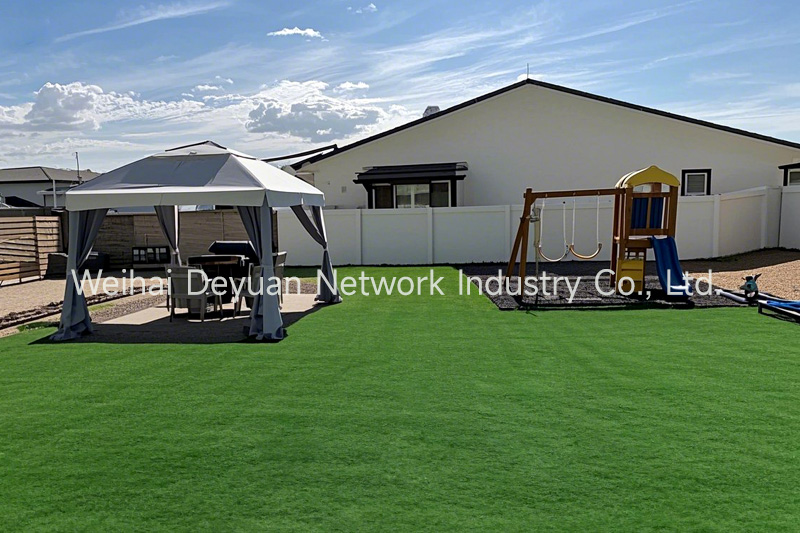
Step 7: Unroll & Position Your DYG Grass
You’ll probably need some help at this point as, depending on the size of your artificial grass, it can be very heavy.
If possible, place the grass in position so that the pile direction is facing towards your house or main viewpoint as this tends to be the best side to view the grass from.
If you have two rolls of grass, ensure the pile direction is facing the same way on both pieces.
Tip: Allow the grass to settle for a few hours, ideally in the sun, to acclimatise before cutting.
Step 8: Cut and Shape Your Lawn
Using a sharp utility knife, trim your artificial grass neatly around edges and obstacles.
Blades can blunt quickly so replace blades regularly to maintain clean cuts.
Secure the boundary perimeter using galvanised nails if using timber edging, or galvanised U-pins, for steel, brick or sleeper edging.
You can glue your grass to a concrete edging using adhesive.
Step 9: Secure Any Joins
If done correctly, the joints should not be visible. Here’s how to join grass sections seamlessly:
First, position both grass pieces side-by-side, ensuring the fibres point the same way and the edges run parallel.
Fold both pieces back about 300mm to reveal the backing.
Carefully cut off three stitches from the edge of each piece to create a neat join.
Lay the pieces flat again to ensure the edges meet neatly with a consistent 1–2mm gap between each roll.
Fold the grass back again, exposing the backing.
Roll out your joining tape (shiny side down) along the seam and apply adhesive onto the tape.
Carefully fold the grass back into place, making sure grass fibres don’t touch or become trapped in the adhesive.
Apply gentle pressure along the seam to ensure proper adhesion. (Tip: Place unopened bags of kiln-dried sand along the join to help the adhesive bond better.)
Allow the adhesive to cure for 2–24 hours depending on weather conditions.
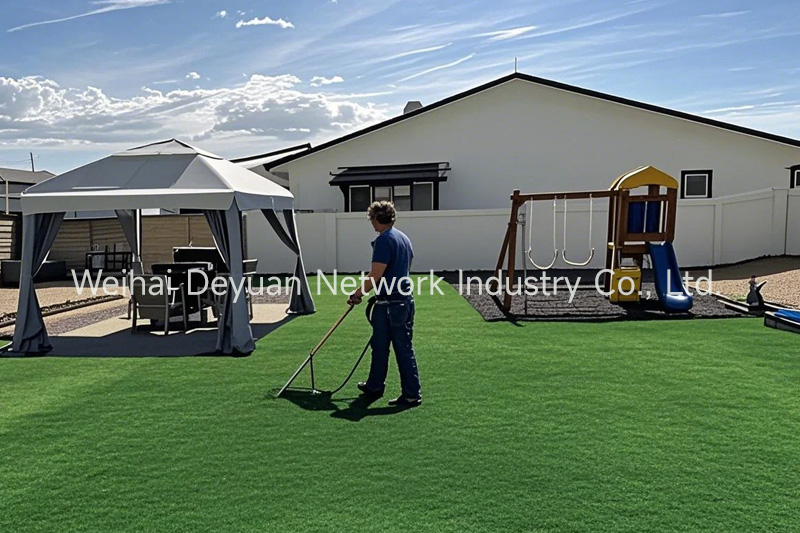
Step 10: Apply Infill
Finally, spread around 5kg of kiln-dried sand per square metre evenly onto your artificial grass. Brush this sand into the fibres with a stiff broom or a power brush, enhancing stability and durability.
Post time: Apr-01-2025